Pick color from picture in InDesign
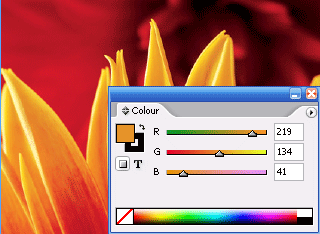 Or convert RGB color to CMYK.
While you are working in InDesign it's essential to know how to pick color from image you just placed because of need to experiment with objects colors surrounding placed image. First of all the solution must be quick and easy. Here is how you can do it.
Place RGB image in your InDesign document (Cmd/Ctrl+D).
Open your color palette - (Window-Color).
Select color picker and click on desired part of image.
Now, color palette will change from CMYK mode to RGB mode.
Double click on the fill rectangle in color palette to open Color Picker window. You will see option "Add RGB swatch". But, we need here option to add CMYK swatch and this will be available if you just place your cursor and click inside cyan field. Finally, click on the "Add CMYK swatch" button.
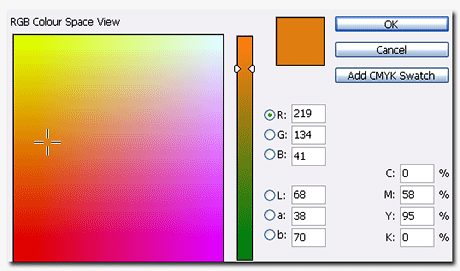
Your new swatch will be available in swatches palette. Double click this new swatch in swatches palette to open swatch options. You will se that we have a little problem. Numbers I got for cyan, magenta and yellow are not acceptable for us who care that everything must or almost be perfect.
This problem is easy to fix if you just hold Shift key and click on one of the sliders for color where you have the problem (in my case I clicked on Magenta).
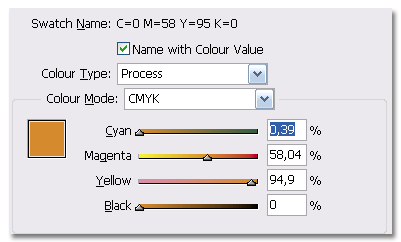
That's it. Easy and clean way to extract desired color from image and to convert RGB color to CMYK.
Basic tips on working with tables in InDesign CS2
InDesign’s table options gives you ability to change many settings when you need to work with tables. First of all this tutorial is based on using InDesign CS2. I am hoping these tips will work in earlier versions too.
As a the first step we will create a simple table. To do that pick your type tool and draw text frame where you want your table to be placed on the page.
Go to table menu and select Insert table with settings: Body rows – 3; Columns – 2; Header rows – 0; Footer rows – 0;
You have changed your mind and now want 3 rows more. For this place your cursor in the last cell and press Tab key on your keyboard as many times as you want additional rows to be added to your table below the last row.

If your table disappeared from the screen pick the selection tool and click on the page where your table was when you created it. You will see rectangle and all you have to do to see your table again is to click on “Fit frame to content” button at the right hand side of the tool palette.

Now we are going to alter strokes on some rows using proxy preview area.
Select your table or individual rows and you will see proxy preview area on the right hand side of the tools palette. (Also, for larger view you can open your strokes palette.)
Reset the proxy palette so no blue lines are visible. I found that three fast clicks will reset it. Now select top line and apply stroke weight and style as you wish. After these effects has been applied go back to your proxy area and deselect blue line. So, you first reset palette then select what you want to change and finally deselect line/s at the proxy preview area. Now you can go forward.

Okay! How we could copy stroke and fill from one cell or row to another cells or rows?
I have one body row with stroke weight 5 pt and dotted stroke style applied on the top and bottom. But now I want to apply this style to individual cells no matter where they are.
Deselect everything and select color picker. Click on the cell from you are going to copy style effect and you will notice how picker change appearance.
Now all you have to do is to click in the center of the cell/s and hold mouse button until you see that the cell is selected.
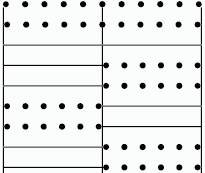
To add color to individual cells you can drag and drop your swatch from swatches palette to center of the cell in order to change fill or to stroke to change the stroke color. During this you will see how your cursor change.
